Add Expense - Copy this React, Tailwind Component to your project
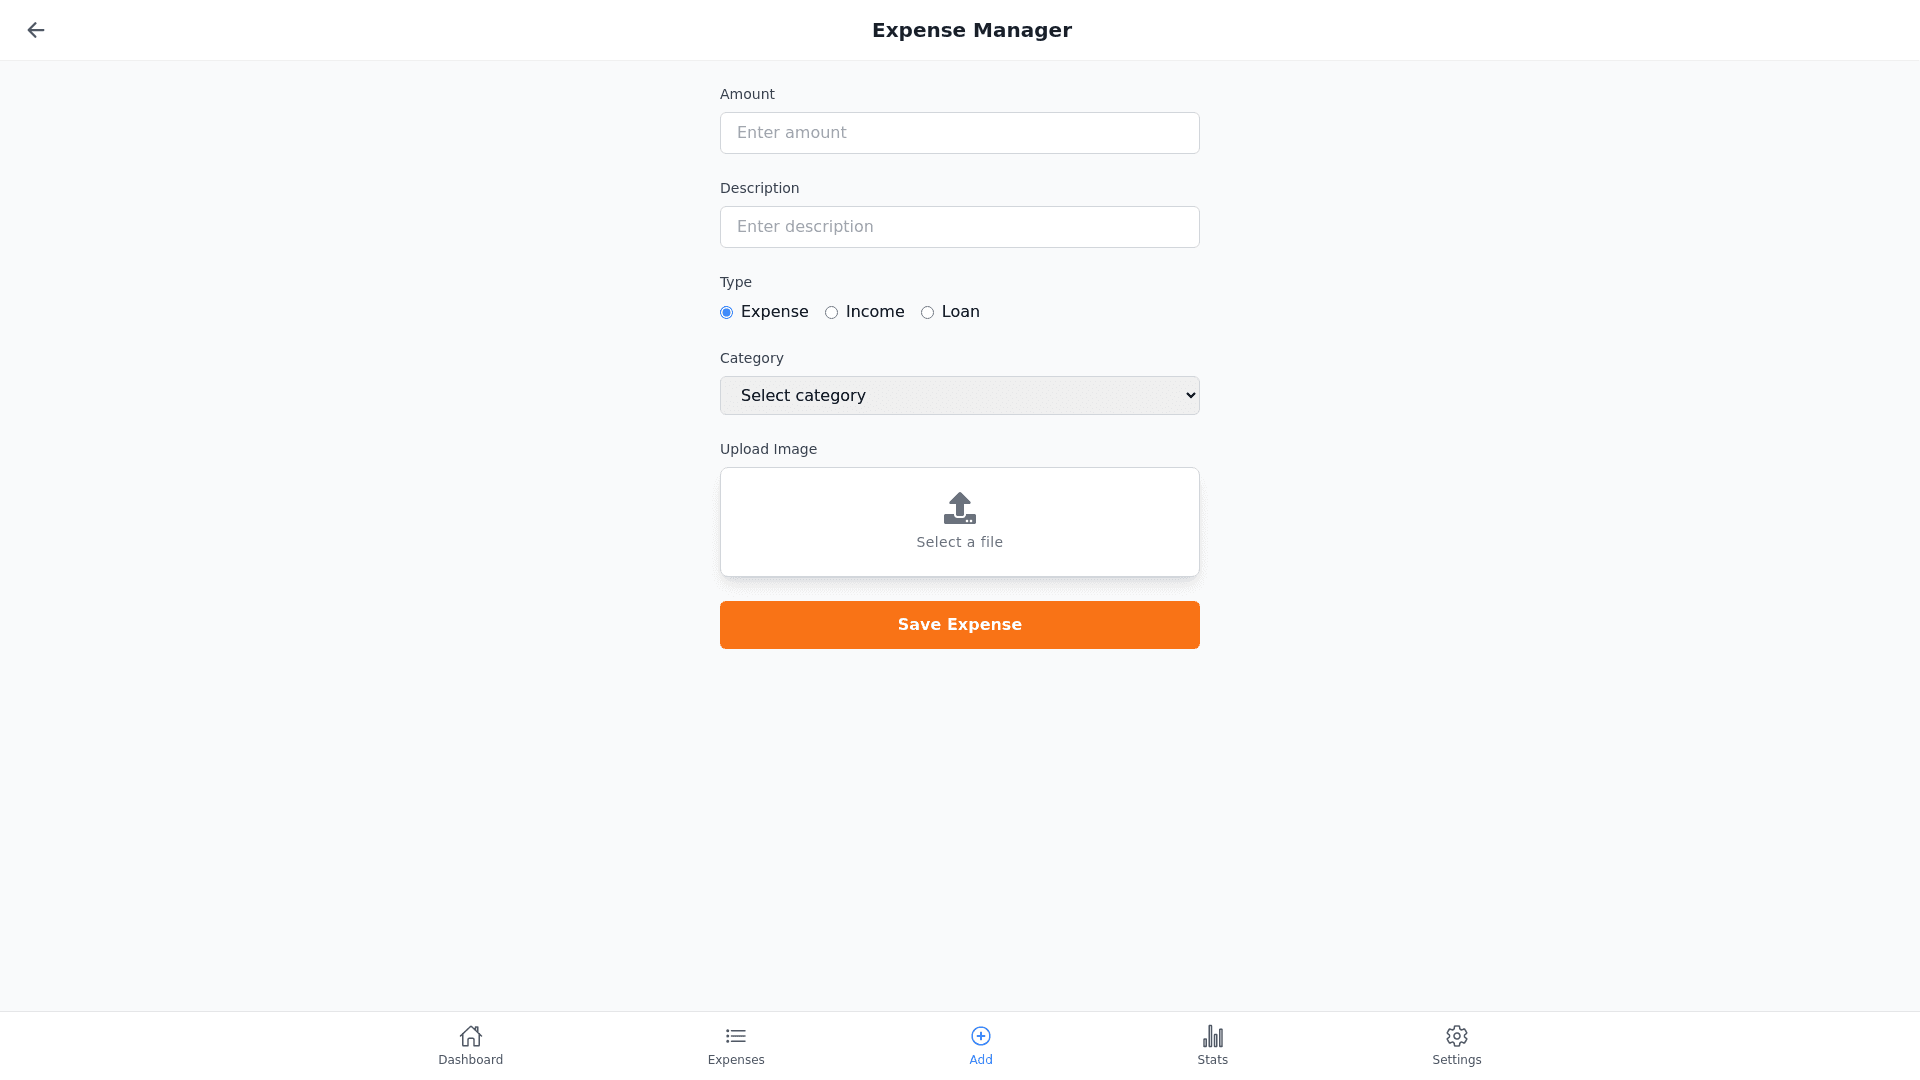
design-me-a-mobile-screen:-Add-Expense-Screen-Screen-Structure-Header:-•-Application-Name:-Displays-the-app-name-centered-at-the-top-(e.g.,-“Expense-Manager”).-•-Back-Button:-A-left-aligned-arrow-icon-to-navigate-back-to-the-previous-screen.-Main-Content:-•-Input-Fields:-•-Amount:-A-numeric-input-field-to-enter-the-expense-amount-(supports-thousand-separators).-•-Description:-A-text-field-for-the-expense-description-(e.g.,-“Shopping,”-“Dining”).-•-Expense-Type:-A-dropdown-or-radio-buttons-to-select-the-expense-type-(e.g.,-“Expense,”-“Income,”-“Loan”).-•-Category:-A-dropdown-to-select-the-expense-category-(e.g.,-“Dining,”-“Entertainment,”-“Transportation”).-•-Image-Selection:-•-Upload-Image-Button:-Allows-users-to-choose-an-image-from-their-gallery-or-take-a-new-picture.-•-Save-Button:-•-A-prominent-button-at-the-bottom-of-the-screen-labeled-“Save”-(or-“Add-Expense”)-for-easy-recognition-and-interaction.-2.-Tab-Bar-Menu-Located-at-the-bottom-of-the-screen-with-icons-representing-the-main-screens:-•-Dashboard:-Graph-icon.-•-Add-Expense:-Plus-icon.-•-Expense-List:-List-icon.-•-Statistics:-Bar-chart-icon.-•-Settings:-Gear-icon.-3.-Colors-and-Style-Colors:-•-Background:-White-or-light-pastel-shades-for-a-clean-and-easy-to-read-interface.-•-Primary-Color:-Green-or-blue-to-convey-freshness-and-friendliness.-•-Button-Color:-A-standout-color-like-orange-or-red-for-the-“Save”-button-to-draw-attention.-•-Text-Color:-Dark-shades-(e.g.,-dark-gray-or-black)-for-text-for-better-readability.-Style:-•-Flat-Design:-Uses-simple-icons-without-shadows-to-create-a-modern-look.-•-Spacing:-Ensures-sufficient-spacing-between-input-fields-and-buttons-to-make-the-interface-user-friendly-and-prevent-errors.