Onboarding Flow - Copy this React, Tailwind Component to your project
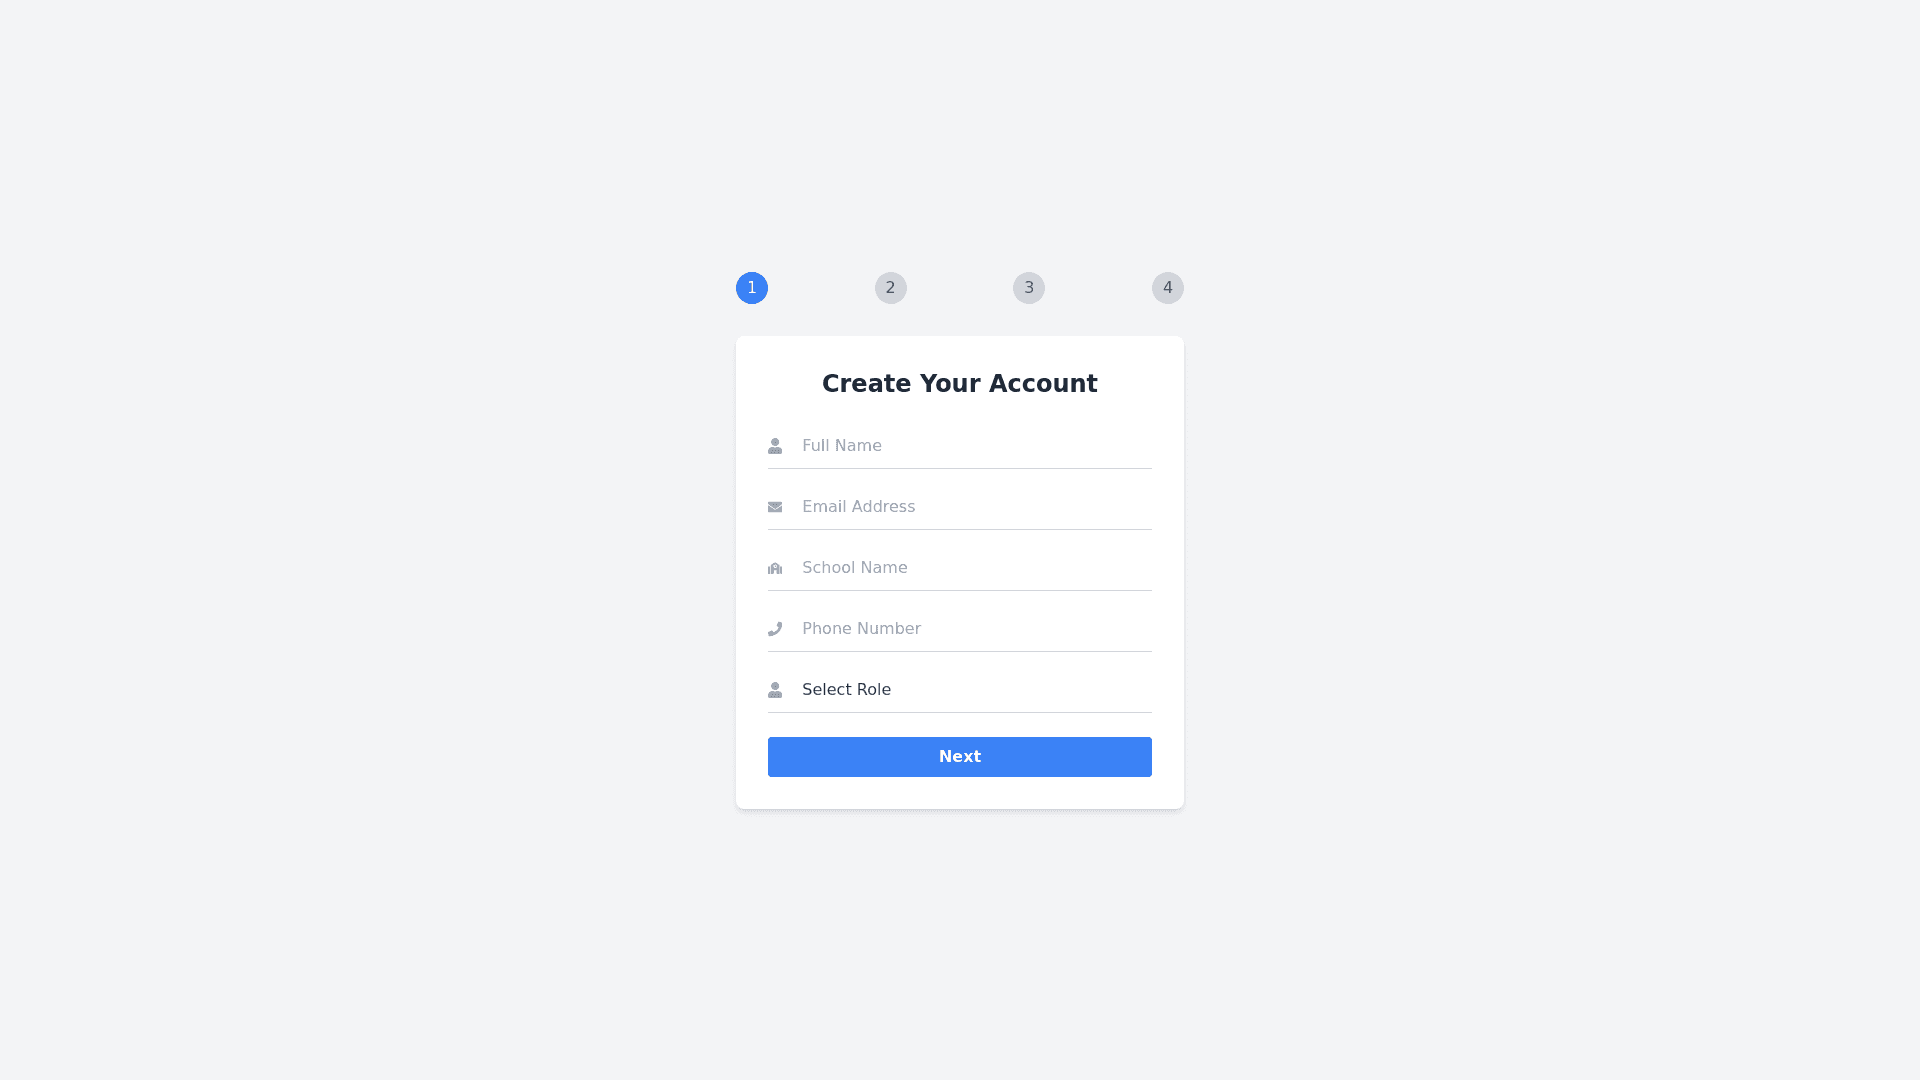
Create a comprehensive UX design flow for the onboarding process of the School Management Software SaaS product, including the following key sections: Client Information, Main Verification, Payment, and Completion. Ensure that the flow is intuitive, user friendly, and visually engaging. 1. Client Information Header: Use a clear title like 'Create Your Account' or 'Client Information'. Form Fields: Include fields for essential information such as: Full Name (text input) Email Address (text input with validation) School Name (text input) Phone Number (text input with format validation) Role (dropdown menu: options like 'Administrator', 'Teacher', 'Principal') Visual Elements: Use simple icons next to each field to enhance usability. Ensure all fields are clearly labeled, and utilize inline validation to guide the user. 2. Main Verification Header: Label this section 'Verify Your Account'. Verification Method: Present options for verifying the account, such as: Email Verification: Inform users that a verification email will be sent and prompt them to check their inbox. Phone Verification: Allow users to receive a verification code via SMS; include a text input for entering the code. Instructions: Provide clear instructions on how to complete the verification, including a progress indicator showing the step (e.g., 'Step 2 of 4'). Resend Verification Option: Include a link or button to resend the verification email or SMS. 3. Payment Header: Title this section 'Payment Information'. Payment Form: Create a secure payment form with fields for: Cardholder Name (text input) Credit/Debit Card Number (masked input) Expiration Date (dropdowns for month and year) CVV (masked input) Billing Address: Include fields for billing address, with an option to use the school address if applicable. Summary of Selected Plan: Provide a brief summary of the selected pricing plan with a total cost display. Secure Payment Assurance: Include security badges (e.g., 'SSL Secure', 'Trusted Payment Processing') to reassure users. 4. Completion Header: Label this section 'Setup Complete!'. Confirmation Message: Display a welcoming message (e.g., 'Congratulations! Your account has been successfully set up.'). Next Steps: Provide a brief overview of what to expect next, such as: Accessing the dashboard Exploring features through a guided tour Receiving a welcome email with resources Call to Action: Include buttons for: 'Go to Dashboard' 'Take a Guided Tour' 'Explore Features' Visual Elements: Use engaging graphics or illustrations to celebrate the user's completion and encourage further exploration. General Design Elements Maintain a consistent color scheme and typography throughout the flow to align with the branding of the SaaS product. Use progress indicators to help users understand where they are in the onboarding process. Ensure the design is fully responsive and optimized for mobile devices, providing a seamless experience across different screen sizes.